> ## Documentation Index
> Fetch the complete documentation index at: https://docs-dev-feat-member-mgmt-docs.mintlify.site/llms.txt
> Use this file to discover all available pages before exploring further.
# Configurer les demandes d’autorisation sécurisées par JWT (JAR)
> Découvrez comment configurer des demandes d’autorisation sécurisées par JWT (JAR) pour une application.
export const AuthCodeBlock = ({filename, icon, language, highlight, children}) => {
const [displayText, setDisplayText] = useState(children);
const [copyText, setCopyText] = useState(children);
const wrapperRef = React.useRef(null);
useEffect(() => {
let unsubscribe = null;
function init() {
if (!window.autorun || !window.rootStore) {
return;
}
unsubscribe = window.autorun(() => {
let processedChildrenForDisplay = children;
let processedChildrenForCopy = children;
for (const [key, value] of window.rootStore.variableStore.values.entries()) {
const escapedKey = key.replaceAll(/[.*+?^${}()|[\]\\]/g, (String.raw)`\$&`);
let displayValue = value;
if (key === "{yourClientSecret}" && value !== "{yourClientSecret}") {
displayValue = value.substring(0, 3) + "*****MASKED*****";
}
processedChildrenForDisplay = processedChildrenForDisplay.replaceAll(new RegExp(escapedKey, "g"), displayValue);
processedChildrenForCopy = processedChildrenForCopy.replaceAll(new RegExp(escapedKey, "g"), value);
}
setDisplayText(processedChildrenForDisplay);
setCopyText(processedChildrenForCopy);
});
}
if (window.rootStore) {
init();
} else {
window.addEventListener("adu:storeReady", init);
}
return () => {
window.removeEventListener("adu:storeReady", init);
unsubscribe?.();
};
}, [children]);
useEffect(() => {
if (!wrapperRef.current) return;
const originalWriteText = navigator.clipboard.writeText.bind(navigator.clipboard);
let isOverriding = false;
const handleClick = e => {
const button = e.target.closest('[data-testid="copy-code-button"]');
if (!button || !wrapperRef.current.contains(button)) return;
isOverriding = true;
navigator.clipboard.writeText = text => {
if (isOverriding) {
isOverriding = false;
navigator.clipboard.writeText = originalWriteText;
return originalWriteText(copyText);
}
return originalWriteText(text);
};
setTimeout(() => {
if (isOverriding) {
isOverriding = false;
navigator.clipboard.writeText = originalWriteText;
}
}, 100);
};
const wrapper = wrapperRef.current;
wrapper.addEventListener('click', handleClick, true);
return () => {
wrapper.removeEventListener('click', handleClick, true);
if (navigator.clipboard.writeText !== originalWriteText) {
navigator.clipboard.writeText = originalWriteText;
}
};
}, [copyText]);
return
{displayText}
;
};
export const codeExample1 = `POST https://{yourTenant}.auth0.com/api/v2/clients/{yourClientId}/credentials
Authorization: Bearer
Content-Type: application/json
{
"name": "My credentials for JAR",
"credential_type": "public_key",
"pem": "[YOUR PEM FILE CONTENT]",
"alg": "RS256"
}`;
export const codeExample2 = `PATCH https://{yourTenant}.auth0.com/api/v2/clients/{yourClientId}
Authorization: Bearer
Content-Type: application/json
{
"signed_request_object": {
"credentials": [{"id": "[YOUR CREDENTIAL ID]"}]
}
}`;
Pour utiliser les fonctionnalités de l’identité très réglementée (HRI), vous devez disposer d’un plan Enterprise avec le module complémentaire Identité très réglementée. Consultez [Tarification Auth0](https://auth0.com/pricing/) pour plus de détails.
Les demandes d’autorisation sécurisées par JWT (JAR) permettent de regrouper les paramètres de requête d’autorisation OAuth2 en un seul paramètre de requête JWT, qui est ensuite signé pour protéger l’intégrité.
## Prérequis
Avant de configurer votre application pour utiliser JAR, vous devez [générer une paire de clés RSA](/docs/fr-ca/secure/application-credentials/generate-rsa-key-pair).
Vous devez générer une paire de clés distincte pour chaque type d’utilisation des identifiants. Par exemple, ne réutilisez pas les mêmes paires de clés pour l’authentification JAR et l’authentification par clé privée JWT.
## Configurer JAR pour une application
Vous pouvez configurer JAR pour une application avec Auth0 Dashboard et Management API.
Utilisez Auth0 Dashboard pour configurer votre application afin qu’elle utilise JAR avec les clés RSA déjà générées.
1. Naviguez jusqu’à [Auth0 Dashboard > Applications](https://manage.auth0.com/#/applications).
2. Sélectionnez l’application à utiliser avec JAR.
3. Sélectionnez l’onglet **Application Settings (Paramètres d’application)**.
4. Dans la section **Authorization Requests (Demandes d’autorisation)**, activez **Require JWT-Secured Authorization (Exiger l’autorisation sécurisée par JWT)**.
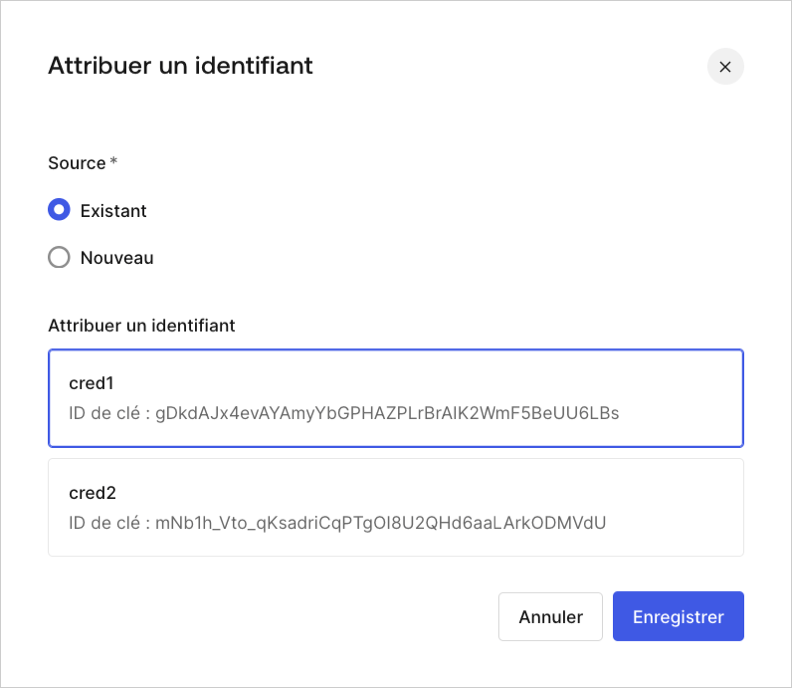
5. Si aucun identifiant n’est attribué et que des identifiants sont disponib]\(/docs/images/serez invité à attribuer un identifiant existant.
 6. Vous aurez également la possibilité d’attribuer un nouvel identiifant.
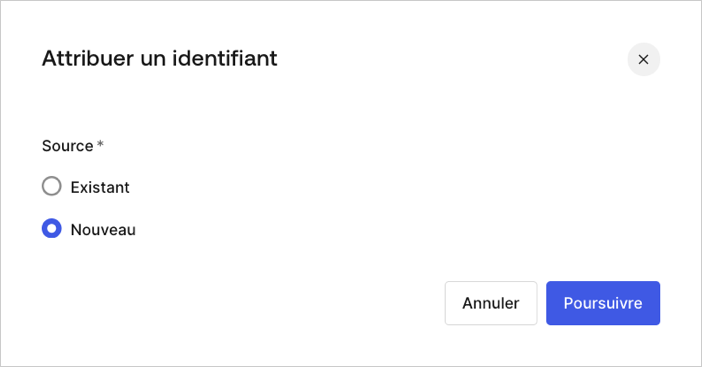 7. Ajoutez et attribuez un nouvel identifiant en téléversant une paire de clés RSA déjà générées. Lorsque vous y êtes invité, entrez ce qui suit :
* Nom\*\*: nom permettant d’identifier l’identifiant\*\*
* **Clé publique** : clé publique du certificat X.509 en format PEM
* **Algorithme** : sélection de l’algorithme de signature JAR
* **Date d’expiration** : définition de la date d’expiration de l’identifiant
Utilisez [Management API](https://auth0.com/docs/api/management/v2) pour configurer JAR pour votre application à l’aide de la propriété de configuration `client signed_request_object`. Cette propriété d’objet contient les champs suivants :
* `required` (obligatoire) : oblige toutes les demandes d’autorisation vers `/authorize` et `/oauth/par` à utiliser JAR. Pour en savoir plus, lisez les articles [Flux de code d’autorisation avec les demandes d’autorisation sécurisée par JWT](/docs/fr-ca/get-started/authentication-and-authorization-flow/authorization-code-flow/authorization-code-flow-with-jar) et [Flux de code d’autorisation avec PAR et JAR](/docs/fr-ca/get-started/authentication-and-authorization-flow/authorization-code-flow/authorization-code-flow-with-par-and-jar).
* `credentials` (identifiants) : une série d’identifiants utilisés pour vérifier les signatures.
Le paramètre des informations d’identification se comporte de la même manière que le paramètre de la clé privée JWT `client_authentication_methods.private_key_jwt.credentials` qui prend en charge la création d’informations d’identification lors de la création d’une nouvelle application. Pour en savoir plus, lisez [Configurer la clé privée JWT](/docs/fr-ca/get-started/applications/configure-private-key-jwt).
Vous pouvez configurer JAR pour une nouvelle application ou pour une application existante au moyen de Management API
#### Configurer JAR pour une nouvelle application
Lorsque vous créez une nouvelle application, configurez JAR en envoyant une demande POST contenant `signed_request_object`. Dans cette demande, vous pouvez aussi enregistrer l’identifiant client correspondant (par exemple la clé PEM) :
```json lines theme={null}
POST https://{yourTenant}.auth0.com/api/v2/clients
Authorization: Bearer
Content-Type: application/json
{
"name": "My App using JAR",
"signed_request_object": {
"required": true,
"credentials": [{
"name": "My credential for JAR",
"credential_type": "public_key",
"pem": "[YOUR PEM FILE CONTENT]",
"alg": "RS256"
}]
},
"jwt_configuration": {
"alg": "RS256"
}
}
```
#### Configurer JAR pour une application existante
Lors de la mise à jour d’une application existante, vous devez d’abord créer un identifiant client de manière explicite. La demande POST suivante utilise le contenu de votre fichier PEM pour créer vos identifiants client pour JAR :
Assurez-vous que les nouvelles lignes sont correctement codées en JSON sans formatage supplémentaire.
Attribuez ensuite les identifiants client à la configuration client `signed_request_object`. La demande PATCH suivante associe les identifiants client à `signed_request_object` :
## En savoir plus
* [Flux de code d’autorisation avec les demandes d’autorisation sécurisées par JWT (JAR)](/docs/fr-ca/get-started/authentication-and-authorization-flow/authorization-code-flow/authorization-code-flow-with-jar)
* [Flux de code d’autorisation avec PAR et JAR](/docs/fr-ca/get-started/authentication-and-authorization-flow/authorization-code-flow/authorization-code-flow-with-par-and-jar)
7. Ajoutez et attribuez un nouvel identifiant en téléversant une paire de clés RSA déjà générées. Lorsque vous y êtes invité, entrez ce qui suit :
* Nom\*\*: nom permettant d’identifier l’identifiant\*\*
* **Clé publique** : clé publique du certificat X.509 en format PEM
* **Algorithme** : sélection de l’algorithme de signature JAR
* **Date d’expiration** : définition de la date d’expiration de l’identifiant
Utilisez [Management API](https://auth0.com/docs/api/management/v2) pour configurer JAR pour votre application à l’aide de la propriété de configuration `client signed_request_object`. Cette propriété d’objet contient les champs suivants :
* `required` (obligatoire) : oblige toutes les demandes d’autorisation vers `/authorize` et `/oauth/par` à utiliser JAR. Pour en savoir plus, lisez les articles [Flux de code d’autorisation avec les demandes d’autorisation sécurisée par JWT](/docs/fr-ca/get-started/authentication-and-authorization-flow/authorization-code-flow/authorization-code-flow-with-jar) et [Flux de code d’autorisation avec PAR et JAR](/docs/fr-ca/get-started/authentication-and-authorization-flow/authorization-code-flow/authorization-code-flow-with-par-and-jar).
* `credentials` (identifiants) : une série d’identifiants utilisés pour vérifier les signatures.
Le paramètre des informations d’identification se comporte de la même manière que le paramètre de la clé privée JWT `client_authentication_methods.private_key_jwt.credentials` qui prend en charge la création d’informations d’identification lors de la création d’une nouvelle application. Pour en savoir plus, lisez [Configurer la clé privée JWT](/docs/fr-ca/get-started/applications/configure-private-key-jwt).
Vous pouvez configurer JAR pour une nouvelle application ou pour une application existante au moyen de Management API
#### Configurer JAR pour une nouvelle application
Lorsque vous créez une nouvelle application, configurez JAR en envoyant une demande POST contenant `signed_request_object`. Dans cette demande, vous pouvez aussi enregistrer l’identifiant client correspondant (par exemple la clé PEM) :
```json lines theme={null}
POST https://{yourTenant}.auth0.com/api/v2/clients
Authorization: Bearer
Content-Type: application/json
{
"name": "My App using JAR",
"signed_request_object": {
"required": true,
"credentials": [{
"name": "My credential for JAR",
"credential_type": "public_key",
"pem": "[YOUR PEM FILE CONTENT]",
"alg": "RS256"
}]
},
"jwt_configuration": {
"alg": "RS256"
}
}
```
#### Configurer JAR pour une application existante
Lors de la mise à jour d’une application existante, vous devez d’abord créer un identifiant client de manière explicite. La demande POST suivante utilise le contenu de votre fichier PEM pour créer vos identifiants client pour JAR :
Assurez-vous que les nouvelles lignes sont correctement codées en JSON sans formatage supplémentaire.
Attribuez ensuite les identifiants client à la configuration client `signed_request_object`. La demande PATCH suivante associe les identifiants client à `signed_request_object` :
## En savoir plus
* [Flux de code d’autorisation avec les demandes d’autorisation sécurisées par JWT (JAR)](/docs/fr-ca/get-started/authentication-and-authorization-flow/authorization-code-flow/authorization-code-flow-with-jar)
* [Flux de code d’autorisation avec PAR et JAR](/docs/fr-ca/get-started/authentication-and-authorization-flow/authorization-code-flow/authorization-code-flow-with-par-and-jar)